centos7搭建Eureka-Server注册中心集群
系统环境:
CentOS 7.6.1810
java version “12.0.1” 2019-04-16
ideaIU-2019.1.3
各peer节点分别为:
192.168.50.200 peer1
192.168.50.201 peer2
192.168.50.202 peer3
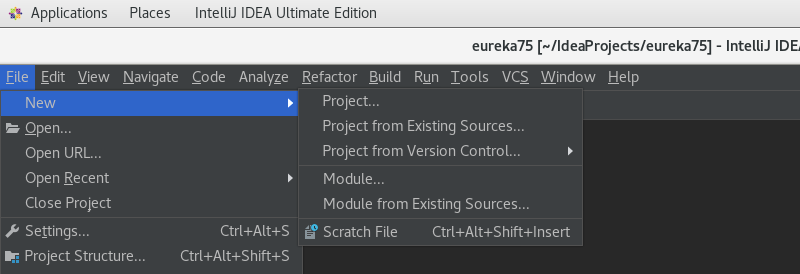
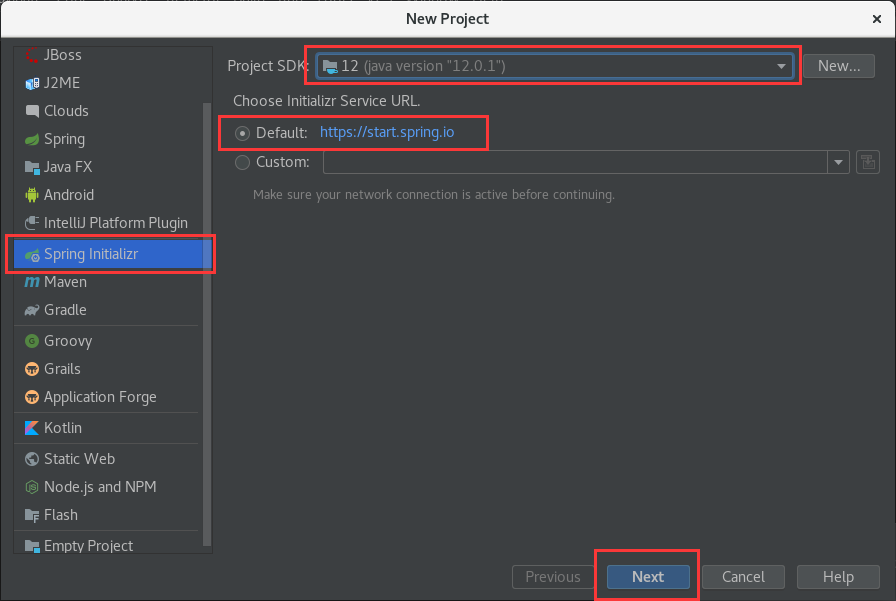
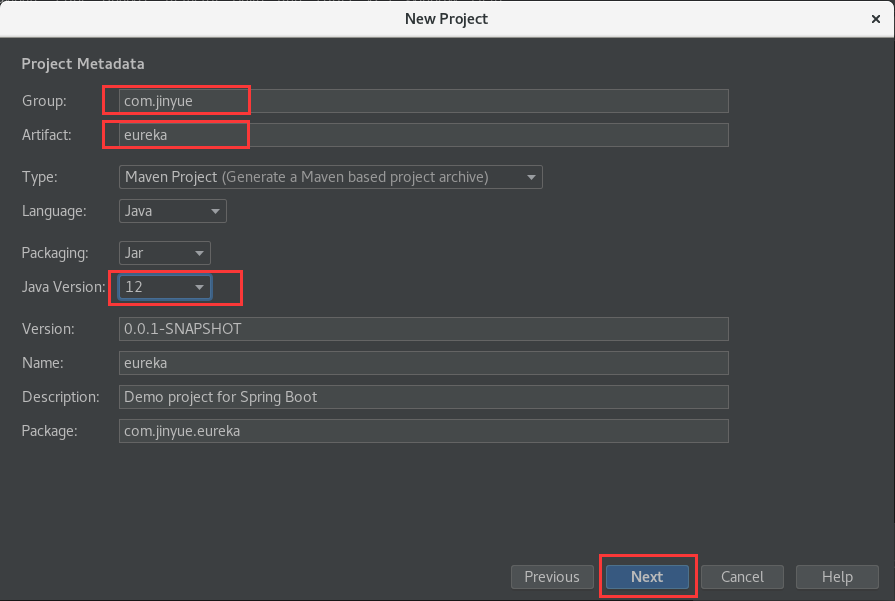
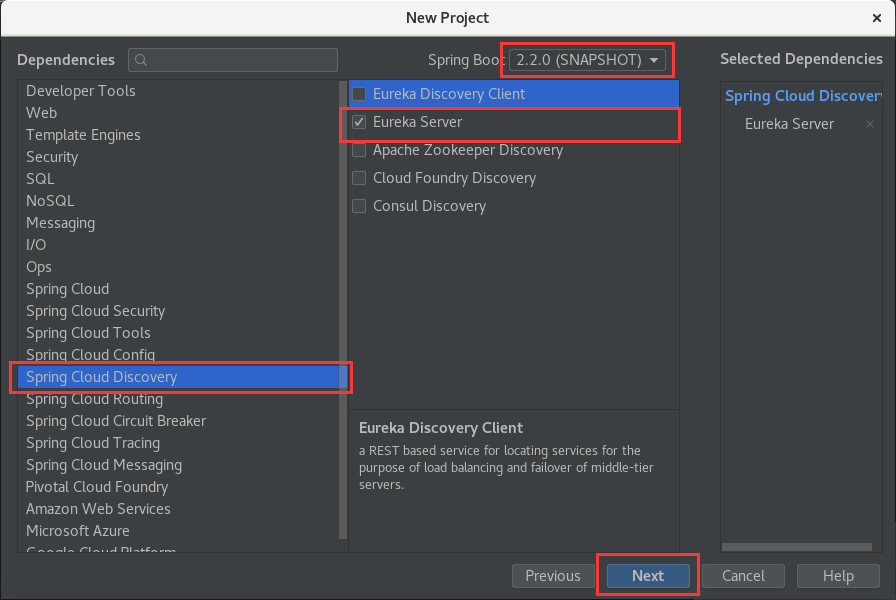
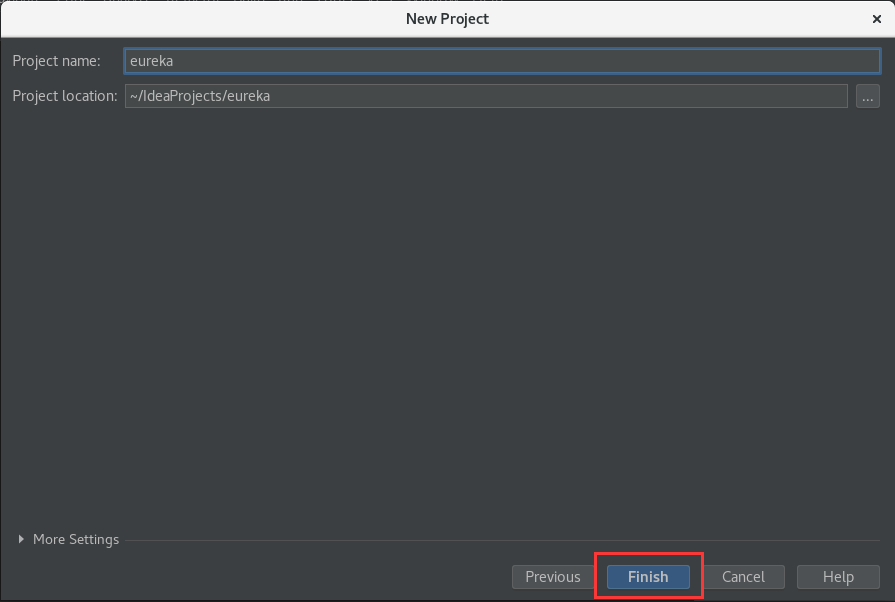
新建项目
在EurekaApplication.java中添加代码
package com.jinyue.eureka;

import org.springframework.boot.SpringApplication;
import org.springframework.boot.autoconfigure.SpringBootApplication;
import org.springframework.cloud.netflix.eureka.server.EnableEurekaServer;    #添加

@EnableEurekaServer    #添加
@SpringBootApplication
public class EurekaApplication {

    public static void main(String[] args) {
        SpringApplication.run(EurekaApplication.class, args);
    }

}
在resources文件夹下新建配置文件
application-peer1.properties
application-peer2.properties
application-peer3.properties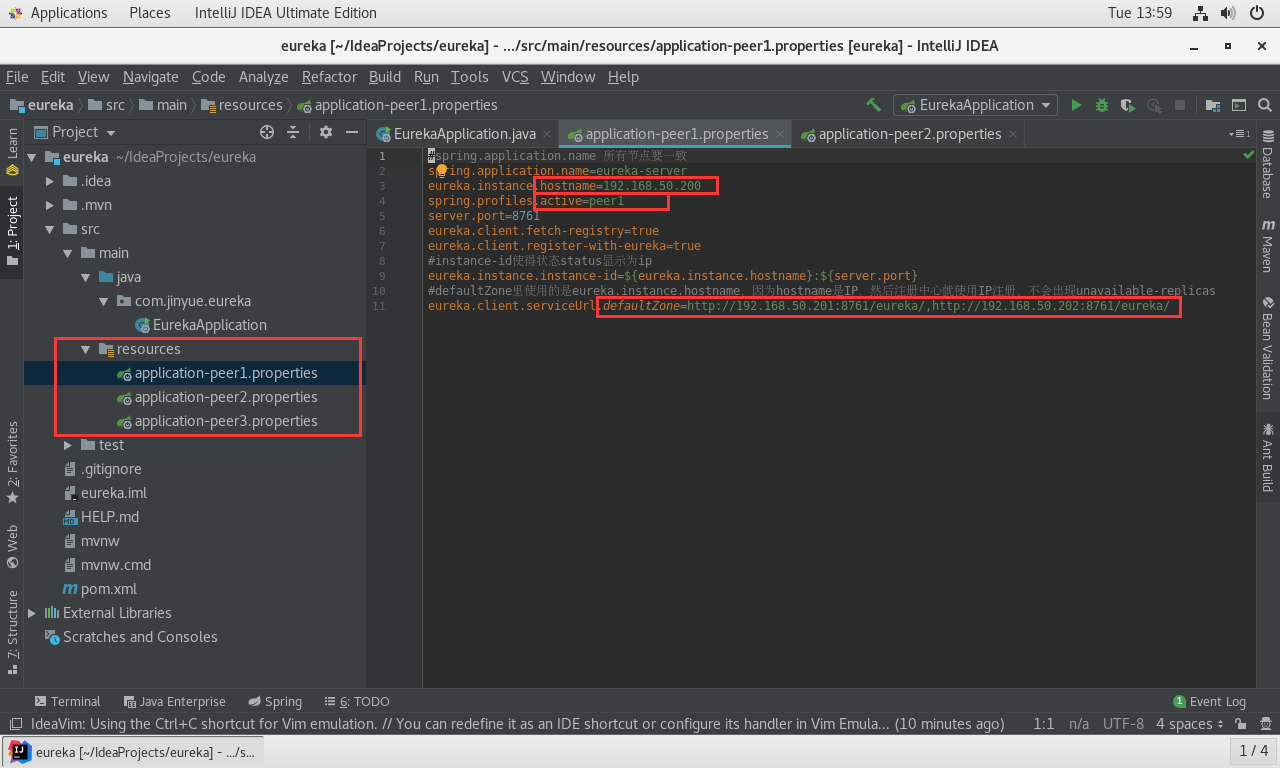
#spring.application.name 所有节点要一致
spring.application.name=eureka-server
eureka.instance.hostname=192.168.50.200
spring.profiles.active=peer1
server.port=8761
eureka.client.fetch-registry=true
eureka.client.register-with-eureka=true
#instance-id使得状态status显示为ip
eureka.instance.instance-id=${eureka.instance.hostname}:${server.port}
#defaultZone里使用的是eureka.instance.hostname,因为hostname是IP,然后注册中心就使用IP注册,不会出现unavailable-replicas
eureka.client.serviceUrl.defaultZone=http://192.168.50.201:8761/eureka/,http://192.168.50.202:8761/eureka/
调试项目
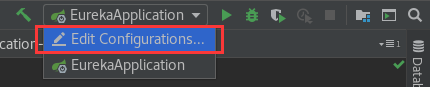
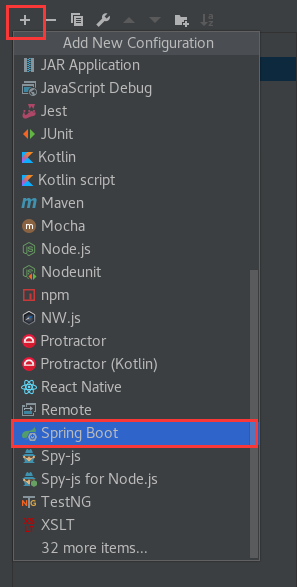
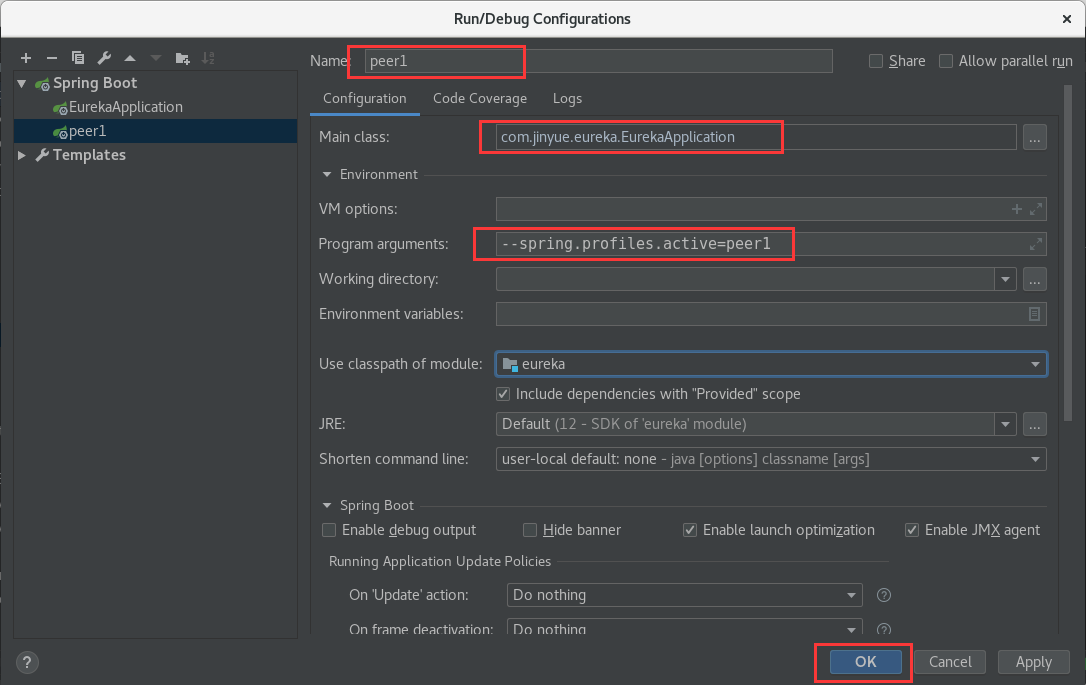
按照这个步骤添加三个启动节点,注意:program arguments 参数依次更改为 peer2 、peer3,与配置文件中的 spring.application.files 参数值对应。

启动后访问:http://192.168.50.201:8761
maven打包jar运行和部署
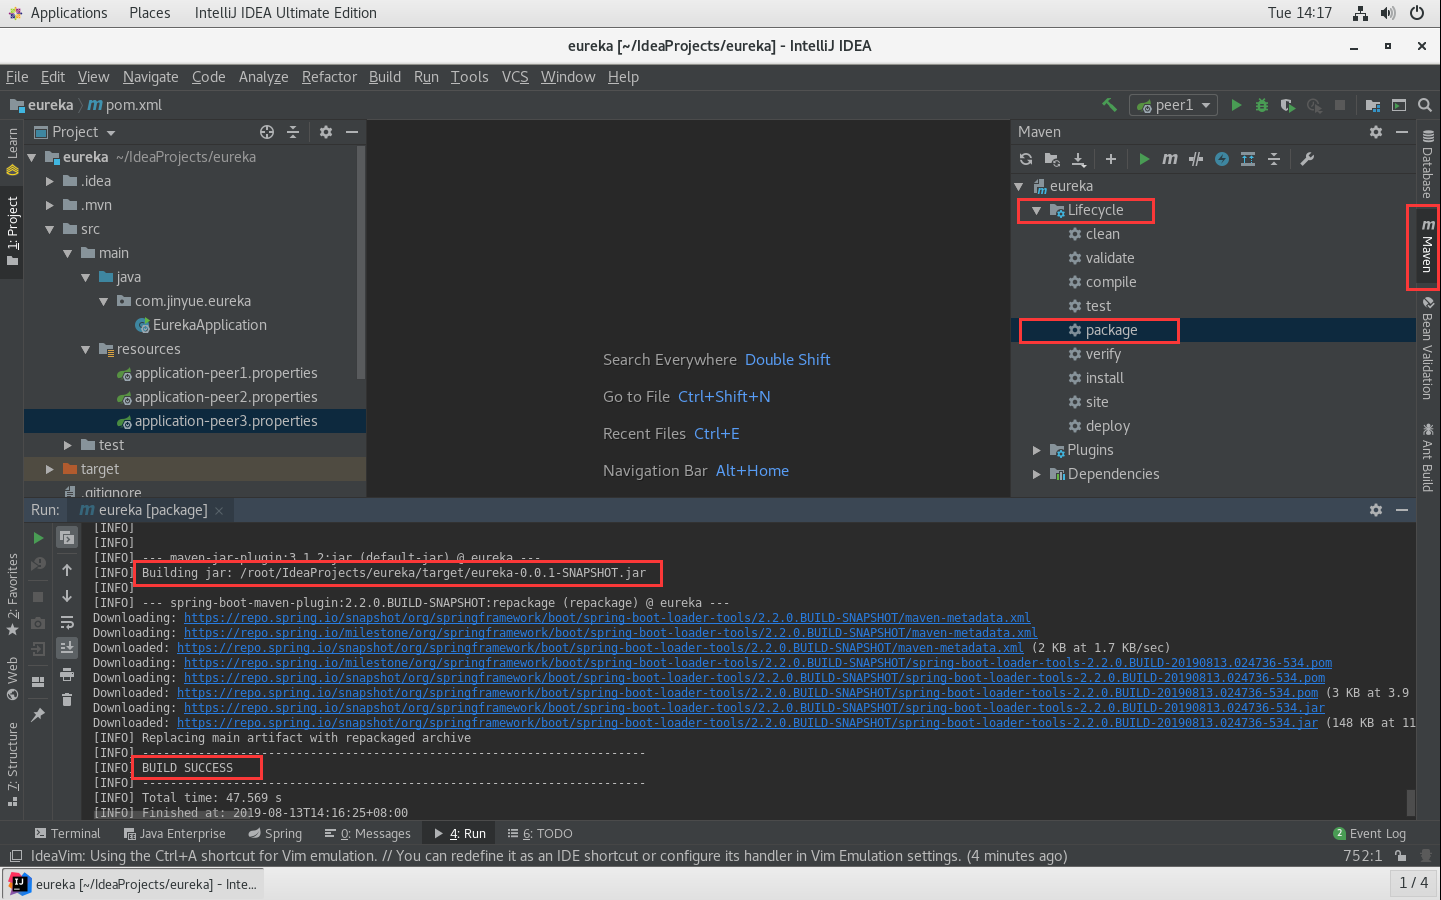
打包后就是一个完整的jar包,存放于项目的target目录下。找到这个eureka2-0.0.1-SNAPSHOT.jar 就可以上传到peer机器上跑了。
各节点 分别 执行 对应的启动命令,因为application-peer*.properties里写固定了peer对应的机器
nohup java -jar /usr/local/eureka/eureka-0.0.1-SNAPSHOT.jar --spring.profiles.active=peer1 > log.file 2>&1 &
nohup java -jar /usr/local/eureka/eureka-0.0.1-SNAPSHOT.jar --spring.profiles.active=peer2 > log.file 2>&1 &
nohup java -jar /usr/local/eureka/eureka-0.0.1-SNAPSHOT.jar --spring.profiles.active=peer3 > log.file 2>&1 &